

I just started learning javascript and I am to build a todo app as my first project, the truth is that it wasn’t a very friendly experience as I have to read a lot of documentation, ask a lot of questions. One of the hardest parts for me was to get a headstart. The first line of code to write. It wasn’t clear but I started and it worked.
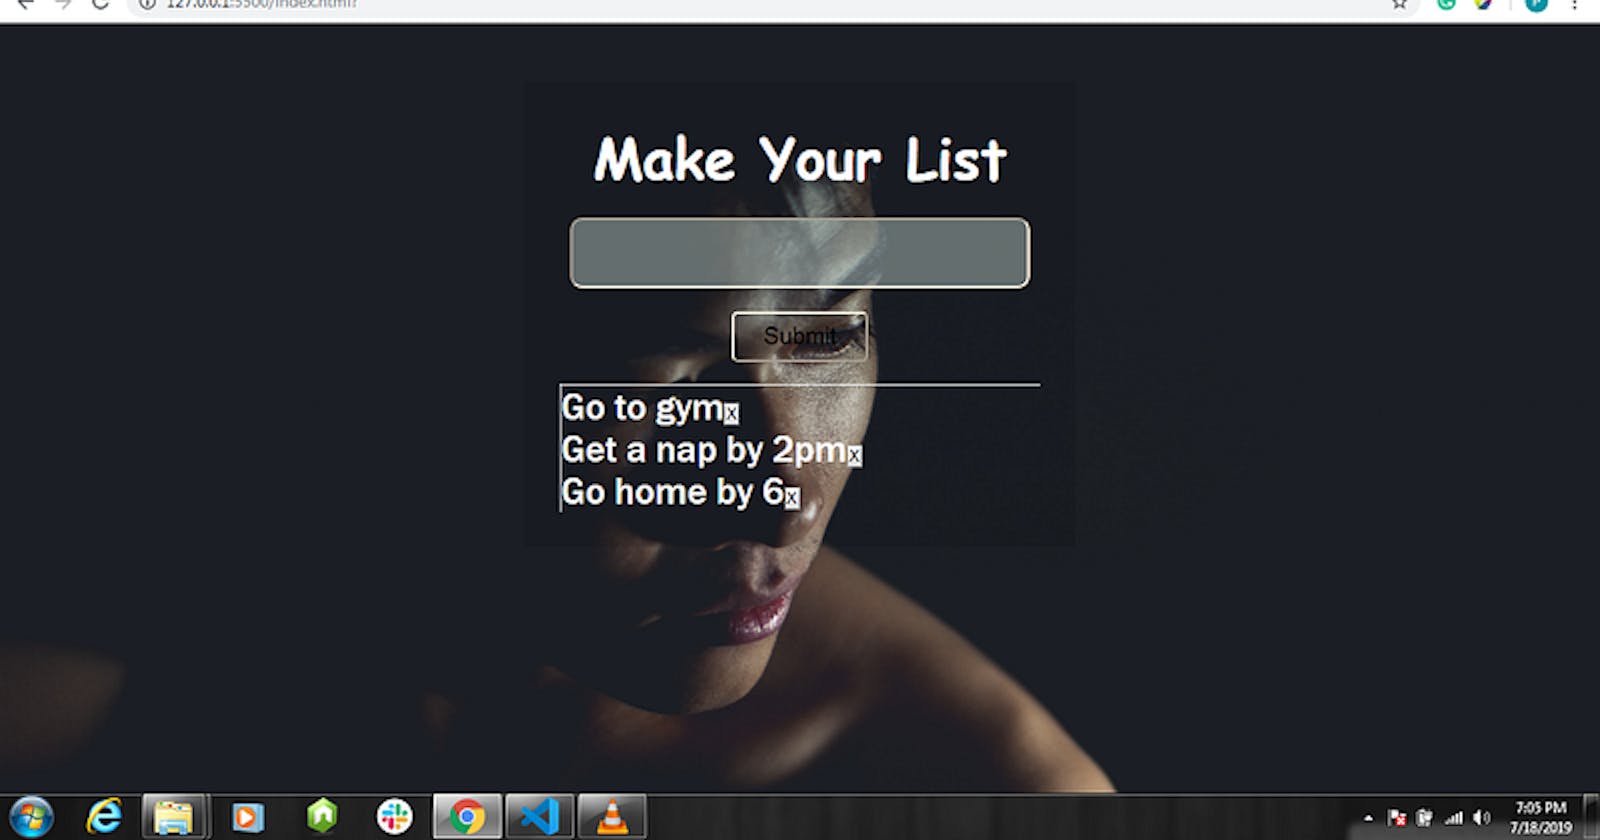
The app I am building will look like the image below:
Dont mind my poor interface, the goal wasn’t to get the interface the goal is to get the functionality of the app using javascript.
I am not good with logical thinking but I have to try and c’mon, everything is learnable. So let get started.
Step1:
Create an HTML structure that will build and execute our javascript logic, looking at the structure we want to achieve we have to take an input from our user and add it to an array using the OL or UL element. So from there, we create our structure.
<!DOCTYPE html>
<meta charset=”UTF-8">
<meta name=”viewport” content=”width=device-width, initial-scale=1.0">
todolist
Make Your List
ID’s are assigned so we can target certain elements and also for easy styling. So we move straight to our javascript. But before that, our app will look like this currently.
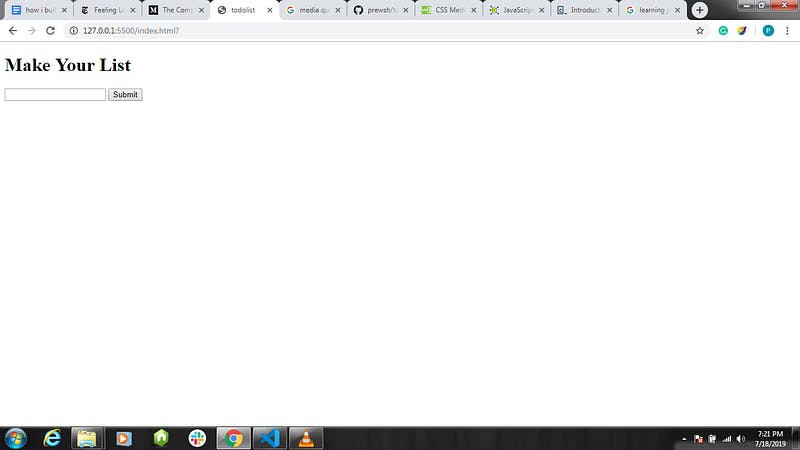
The boldly written MAKE YOUR LIST was added using the h1 element, you can also check out some tutorials and articles on HTML is you are not conversant with it, I will focus on the javascript part in this article.
So we create our javascript as a different file and link it using the script element. So let’s add our logic.
const todos = []
const form = document.getElementById(‘listform’)
const add = function(e){
e.preventDefault()
let item = document.getElementById(“inputlist”).value
todos.push(item)
display()
document.getElementById(“inputlist”).value = “”
}
const display = function(){
let button = document.createElement(“button”)
let newItem = document.createElement(“li”)
let orderedList = document.getElementById(“mylists”)
todos.forEach(function(todo){
newItem.textContent = todo
button.textContent = “X”
button.addEventListener(“click”,function(){
newItem.remove()
})
newItem.appendChild(button)
orderedList.appendChild(newItem)
})
}
form.addEventListener(‘submit’,add)
Don’t worry i will explain the code bit by bit. Don’t be scared, I was scared when I saw it for the first time too but follow me and be strong lol;
const todos = []
const form = document.getElementById(‘listform’)
The first two lines of my javascript are where I created an array called todos and also created a constant called form where I filled it with elements from my Html element with the ID listform
const add = function(e){
e.preventDefault()
let item = document.getElementById(“inputlist”).value
todos.push(item)
display()
document.getElementById(“inputlist”).value = “”
}
So we create a function called add, this function makes it possible for us to push the content of our inputlist to an item and then push the item to the array created earlier. We call a function called display() which will help us display the element on our screen. Then the last line of code clears the space, it makes our input goes off after we have typed it.
So we move on. The next line of code is the part where we created the function display which we called earlier to make things the inputs display on our screen. So let’s explain.
const display = function(){
let button = document.createElement(“button”)
let newItem = document.createElement(“li”)
let orderedList = document.getElementById(“mylists”)
This first three line is where we create our elements using the let and the because we want to be able to delete our tasks we created a button called button, also the li element was created and added to newItem and also the ID ‘mylists’ was gotten and made into an ‘orderedList’.
So here is where we write our main functions and our app is coming together, at this point you can save and run the app to see what happens when you type in some Todo tasks.
todos.forEach(function(todo){
newItem.textContent = todo
button.textContent = “X”
button.addEventListener(“click”,function(){
newItem.remove()
})
we want to loop the array using the forEach; so we have the code above written, the function todo inside the forEach signifies each of the LI element inside the todos function created earlier. While we loop, we do each line of code inside that function. The addEventListener added to the button makes it able for us to remove the task whenever we click the X button we created earlier. The function that removes the task/ list is the “.remove” function called in the last line.
newItem.appendChild(button)
orderedList.appendChild(newItem)
})
}
form.addEventListener(‘submit’,add)
Right now what is remaining is for us to append our button and our newItem created to where they are meant to be and also add an addEvenListener to our form so that we can be able to submit the form whenever we tap the button enter on our keyboard.
Note that this is very necessary because on default the form refreshes itself anytime we submit input, and we had to stop that action by putting these lines of code in our earlier code.
e.preventDefault()
you can go up and look at the code we posted to understand more what I am trying to explain.
Follow my steps you will achieve a simple todo app, you can even achieve this on your first day, and also remember you learn mostly by practice so, open your ide and code.
The link to my repo is below.https://github.com/prewsh/todoApp